This circuit can be used to
test the battery without the need of power supply or expensive moving-coil voltmeters. It has two Ranges: Pls SW1 is set as shown in the circuit diagram, test the circuit cans 3V to 15V batteries. When SW1 is switched to the other position, only 1.5V cells Can be tested.
") Skema Rangkaian Battery Tester ( Penguji Battery)
Skema Rangkaian Battery Tester ( Penguji Battery)List Component:
R1______________2K2 1/4W Resistor
R2______________3R3 1/4W Resistor
R3_____________10R 1/4W Resistor
R4______________4K7 1/4W Resistor
R5_____________33K 1/4W Resistor
R6,R7_________100K 1/4W Resistors
R8____________220K 1/4W Resistor
R9____________330K 1/4W Resistor
R10___________500K Trimmer Cermet
C1,C2__________10nF 63V Polyester Capacitors
C3-C7_________100nF 63V Polyester Capacitors
C8____________220µF 35V Electrolytic Capacitor
D1,D7___________LEDs Red 5mm. (see Notes)
D2-D6________1N4148 75V 150mA Diodes
Q1___________2N3819 General purpose FET
Q2,Q3_________BC337 45V 800mA NPN Transistors
IC1,IC2________7555 or TS555CN CMos Timer ICs
P1_____________SPST Pushbutton
SW1____________DPDT Switch
BUT____________Battery under test
Testing 3V to 15V batteries:
- Switch SW1 as shown in the circuit diagram.
- Place the battery under test in a suitable holder or clip it to the circuit.
- Wait some seconds in order to let C8 reach its full charge.
- LED D1 illuminates at a constant intensity, independent of battery voltage.
- If D1 illuminates very weakly or is fully off the battery is unusable.
- If D1 has a good illumination, press P1 and keep an eye to LED D7. If D7 remains fully off, the battery is in a very good state.
- If D7 illuminates brightly for a few seconds, the battery is weak. This condition is confirmed by a noticeable weakening of D1 brightness.
- If D7 illuminates weakly for a few seconds but D1 maintain the same light intensity, the battery is still good but is not new.
Testing 1.5V batteries:
- Switch SW1 in the position opposite to that shown in the circuit diagram.
- Place the battery under test in a suitable holder or clip it to the circuit.
- Wait some seconds in order to let C8 reach its full charge.
- LED D1 illuminates very weakly only in presence of a new battery, otherwise is off.
- Press P1 and keep an eye to LED D7. If D7 remains fully off the battery can be in very good state.
- If D7 illuminates brightly for a few seconds, the battery is weak.
- If D7 illuminates weakly for a few seconds, the battery is still good but is not new.
- If you are suspecting a 1.5V cell to be completely discharged, a better test can be made wiring two 1.5V batteries in series, then running the 3V test.
The TS555 is a single CMOS timer which offers very low consumption and high frequency (f(max.) TS555 = 2.7MHz - f(max.) NE555 = 0.1 MHz) Thus, either in Monostable or Astable mode, timing remains very accurate.

IC TS555 Pinning
The TS555 provides reduced supply current spikes during output transitions, which enables the use of lower decoupling capacitors compared to those required by bipolar NE555. Timing capacitors can also be minimized due to high input impedance (1012 W).
Maximum rating ic
Supply Voltage: +18 V
Junction Temperature: +150 oC
Source
 Rangkaian Remote Tester
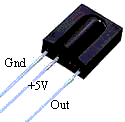


")


